RSS

Tuesday, May 25, 2010

Recipe of the Week: Blunanachini Mini Loaves

Blunanachini (bloo-na-na-kee-nee): Simply put, it is deliciousness in a mini loaf. Banana bread on crack. Blueberry muffin after a hard night on the town. The question really should be: What ISN'T Blunanachini???

Well my friends, you'll just have to make the recipe and find out for yourselves what makes this tasty treat so stupendous.

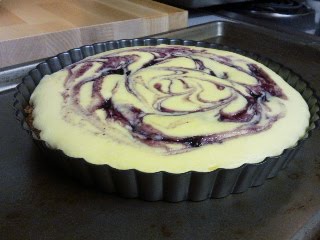
PS... This is NOT my photo. I was too lazy to take any, so I used the photo from the original recipe which I modified, but it still looks pretty much the same. Got it? Good.


Blunanachini Mini Loaves

3 eggs, lightly beaten
1/2 C vegetable oil
1/2 C apple sauce
3 tsp vanilla extract
2 1/4 C white sugar
1 C shredded zucchini
1 C mashed bananas
2 1/2 C all-purpose flour
1/2 milled flax
1 tsp salt
1 tsp baking powder
1/4 tsp baking soda
2 Tbsp ground cinnamon
2 C fresh blueberries

Yield: about 12 mini loaves

Preheat your oven to 350F. Grease your mini loaf pan.

Combine eggs, vegetable oil, apple sauce and vanilla in a large mixing bowl. Stir in sugar until you get an evened-out mixture. Stir in zucchini and bananas until combined.

Next, if you want to do it the right way, you would combine the flour, flax, salt, baking power, baking soda and cinnamon in a separate bowl so that they are all mixed together before you add it to your wet mixture. This ensures an even distribution of ingredients. I'm lazy... I did not do this and they turned out just fine. Your call.

Mix in dry ingredients one cup at a time until completely combined. I like to take a measuring cup to spoon the mixture into the mini loaf pan so that I know each one is getting the same amount in it and my loaves come out even. For this, I used 1/2 cup of batter for each mini loaf. You could probably go as much as 3/4 of a cup, but that will add about 10 minutes to your bake time.

So... if you are using a silicone mini loaf pan, you should put it on a cookie sheet prior to filling it so that you don't slosh things all around trying to get it into the oven. Next, spoon about half a cup of batter into each greased mini loaf. Bake for approx. 40-50 minutes until inserted toothpick or knife comes out clean. The original recipe said to bake for 50 minutes, but mine came out just perfect around 43 minutes. Depends on your oven, so I would start checking at 40 minutes.

Cool in mini loaf pan for about five minutes, then remove from pan and place on cooling rack or waxed paper. Once completely cooled, I put mine into plastic bags, tied with a ribbon and gave a few away. It was cute. Enjoy! Comments please!

Thursday, May 13, 2010

Caramelized Banana Stuffed French Toast

Well I don't know about you, but I love bananas. I also love caramel. And I absolutely love the two of them combined. All that was left was deciding what to pair them with... ummm... stuffed french toast! Heck yeah!

Now I'm the first to admit that most of my experimental concoctions don't always turn out as planned. But... I hit gold with this one my friends. The tangy-tartness of the cream cheese paired with the sweetness of the caramelized bananas and cinnamon french toast made the perfect dish. Enjoy and please leave comments or suggestions!

Caramelized Banana Stuffed French Toast


6 slices french bread
3 large bananas, sliced
2 eggs
3 Tbsp milk
1/2 tsp cinnamon
1 tsp vanilla
6 Tbsp butter
5 Tbsp brown sugar
1/2 cup cream cheese
2 Tbsp oil


First you want to caramelize your bananas. Using a medium saucepan over medium heat, melt the butter and brown sugar together. Next add in the bananas and bring to a rolling boil for 4 minutes, or until the sauce is as thick as you like. The bananas should be cooked, but not turned into mush and you should have a nice syrup. Set this mixture aside while you make the french toast.


Put a small amount of oil in your pan and set to medium heat. While this is heating, get your french toast mixture ready. Combine eggs, milk, cinnamon and vanilla in a bowl. Take one slice of french bread and dip both sides into mixture then place in pan. Repeat with a second piece. Cook until nicely browned on both sides, approximately 3-5 minutes.


Spoon a small amount of caramel syrup onto serving plate and place one piece of french toast on plate. Smear with about a tablespoon of cream cheese (to taste) and top with second piece of french toast. Top with caramelized bananas and syrup.


Repeat to make two more servings. Enjoy!

Monday, May 10, 2010

My Psychotic Roommate: Part 3

Umm, yeah... so... she hid the silverware. I shit you not, she hid... the silverware. Who does this?! However, not only did she hide the silverware (most of which she had to have taken out of the dirty dishwasher and washed by hand because the other dirty dishes are still in there) but, she hid the silverware organizer. Although, I have to be fair, I'm not entirely certain that 'hid' is the appropriate term. I suppose something along the lines of 'took away' miht be better.

She took away the silverware and silverware organizer. Yes, that sounds right. Can anyone think of a reason a sane person might do something like this??? Please, tell me. I am eager to listen. *hears a slight breeze and a cricket chirping*

But... my stories always have a kicker.... she replaced the silverware and the organizer with the version of holder silverware she could find. In my little ol' brain I am thinking that she did this because she didn't want me to use her silverware. So what did she do? She bought some pitty silverware for me because she figures I don't have any of my own?!

This is insanity my friends! What else has disappeared in the past week? Let's see... the blender, her table, some cooking utensils, most of her food, her sanity... I'm sure there's more that I haven't noticed yet.

What can we learn from this situation? Well... I think first and foremost, it is important to find a job and apartment that you can afford without having to rely on another person's money.

Live single, don't mingle.


That's going to be my new motto. If there were any way that I could afford to live here alone without working 80+ hours a week, I would in a heart beat. Anybody reading this... cross your fingers that I find a good roommate... soon.

Friday, May 7, 2010

BONUS Recipe of the Week: Blueberry Cheesecake Tart

I always see recipes online for beautiful tarts, but I've never had a tart pan to make them. Well... I finally bought one and just had to use it right away. I didn't have any fruit on hand to make a proper tart, but I did have the makings for a cheesecake, so... I compromised. It turned out to be too yummy for words. I had to wing the recipe because I couldn't find one online for a cheesecake tart, but for once it came out better than I'd imagined. I also put in a swirl of my own homemade blueberry sauce from berries I picked and canned last summer. Enjoy!

Sarah's Blue Cheese Tart


8 oz. Whipped Cream Cheese
1/4 cup sour cream
1/4 cup granulated sugar
1 egg, beaten
1 tsp vanilla extract
1 Tbsp lemon juice
4-6 Tbsp fruit sauce/jam (optional)

6 graham crackers
4 Tbsp butter, melted
2 Tbsp brown sugar


Preheat your oven to 425 degrees F. Place your graham crackers in a sandwich bag and smash the heck out of them until they are all crumbled and powdery. Put these into a small bowl and mix in butter and brown sugar until combined. Press mixture into your tart pan. There should be enough to cover the bottom and go up the sides just a bit. Place in the oven and back for approximately 10 minutes or until nicely browned. Take out to cool, set aside.

For the pie filling, mix together cream cheese, sour cream, sugar, egg, vanilla, and lemon juice until well combined and you don't see any lumps. Pour mixture into pie shell.

Now, you could just be finished here if you like your cheesecake plain. This recipe is sweet enough on it's own not to need the fruit if you don't want it. Or, you could spoon some sliced strawberries over the top when you're done. It's up to you. I happened to have some homemade blueberry sauce on hand, so that's what I used. I spooned about 4 dollops on top of the cream cheese mixture, then I took a fork and swirled it about a bit to make a nice pattern.

Bake uncovered for approximately 15-18 minutes or until the top is just starting to brown. When you take the tart out there should not be much jiggle to it and you should be able to touch the top without getting a gooey finger. If that is not the case, pop it back in the over for 3-5 minutes. Let the tart cool for at least 10 minutes before removing edge of tart pan. Voila! Your cheesecake is ready to eat. Garnish as you please and enjoy!

Tuesday, May 4, 2010

Recipe of the Week: Strawberry Cream Cheese Muffins

I found the recipe for these yum-yums on one of my FAVORITE sites in the whole wide world: FoodGawker.com. Basically, it's the bees knees. I have spent hours upon hours browsing the recipes there and compiling a favorites list to die for. I keep things that I think I might want to make some time, things that I might already know how to make but need a reminder of every now and then, and things completely new and wanna-gotta-have-it-now.

Needless to say, the Strawberry Cream Cheese muffins were gotta-have-it, so... here you go. Here is the link to the recipe that I used from Jane's Sweets and Baking.

Pleas take the time to peruse both FoodGawker.com and Jane's Sweets and Baking. You will find many a tasty treat. Now... onto our recipe...

Strawberry Cream Cheese Muffins


So basically, I followed Jane's recipe to the T, except.... instead of whole milk, I used coconut milk for a richer flavor. After tasting the finished product I might have stuck with the whole milk instead, just for personal taste. I did not have any almond extract, so I didn't use that or substitute anything at all.

At first I had considered using a mini-loaf pan instead of muffins, but I'm glad I didn't because I can see that the tops of the muffins would have burnt before the middle was fully cooked.


In any case, my first attempt at this recipe turned out pretty good. I probably wouldn't make these again because I was expecting some cream cheesy goodness on the inside of the muffin, but there was none because the muffin sucked it up. I also do ot think the coconut milk worked well in this situation.

However... I would consider trying this recipe with bananas instead of strawberries and caramel or even peanut butter instead of cream cheese. Just a thought. Give it a try yourself and post your thoughts. Enjoy!

The Drooling MUST Come To An End

Seriously... the drooling. It began about a month ago. I started waking up with wet spots (no snickering!) on my pillow, then waking up in the middle of the night with my face in a puddle of drool. So much, in fact, that I actually had to turn my pillow over. And of course anyone who knows me knows that sometimes I sleep sitting up because it's easier to breathe. Gravity is a bitch. What happens then? The drool rolls down my chin and onto my chest. Example:


Well... some casual drooling is no big deal, right? Everybody gets their drool on now and then. However... excessive drooling is no laughing matter my friends, and that is what I seem to be up against. Why? How? Why me?!!!

I don't understand how one day you can be just the normal person walking down the street and the next day you're someone who needs to go to Drooler's Anonymous. Seriously, this is ridiculous. The other day I woke up from a doze on the couch to find that I had soaked through not only the fleece sweater I was wearing, but also the shirt underneath was glued to my chest and dried slobber was on my chin. Too sexy for words, I know.

Here is today's work of art:


Really?! What is going on here? Honestly... if anybody has any tips I would love to hear them. Maybe I should set up a collection tube from my mouth and start packaging the drool to sell on eBay. People will buy anything. I'll say it's Elvis spit and sell it for $50 a teaspoon. FML

Sunday, May 2, 2010

Recipe of the Week: Philly Steak Sub!

One of my favorite restaurants ever was called Touch of Philly. Unfortunately, a few years back the owner retired and they went out of business. Touch of Philly made the best steak subs I have ever had, and I have made attempts to duplicate them in the past, but now I think I've finally cracked the code. It's all in the meat selection.

Getting the thinnest cut of meat possible is key to a great steak sub. I've heard you can go to the butcher and asked for beef sirloin SHAVED. I haven't had much luck with this. However, while at Uwajimaya asian market, I found some paper-thin sliced beef short ribs. PERFECT!

Now... what else??? The cheese is also key to a great steak sub. White American and Provolone. No substitutes. These cheese melt well and blend together for just the right creamy, cheesy-ness that is character of steak subs.

Ok, so onto the rest. Get some fresh baked french bread hoagie rolls, onions, and a little mayonnaise. If you're really going to go all out, you could spend 30 minutes caramelizing your onions. Just depends on your tastes.

Here is how I make mine:

1/4 lb very thinly sliced beef
2 slices white american cheese
1 slice provolone cheese
1 Tbsp mayonnaise
1/4 onion, sliced
hoagie roll

Set a large saucepan over medium heat; add 1 tablespoon of oil. Once the oil is heated, add your sliced onions to the pan and saute for about 5-7 minutes until the onions are slightly browned and tender. Set aside. There should still be some oil in the pan, if there is not, add a small amount to just coat the bottom of the pan. Place the slices of beef into the pan and as they cook, pull apart the pieces using a wooden spoon. You should have small-medium pieces. This will cook very fast, so keep the meat moving in the pan so it does not burn. You might add a little water at this time to release the meat's juices and keep from burning.


Add your onions into the pan and mix in. Pile the meat/onions into the center of the pan in a straight line. Lay the slices of cheese on top so they begin to melt. Now you can put the mayonnaise onto both sides of the hoagie and lay the hoagie on top of you meat/cheese. By laying the roll on top of the cheese/meat you are trapping the heat inside to help the cheese melt and warm your roll up. This should only take a couple of minutes, you be the judge.

Now, take your wooden spoon or a spatula and slide it under everything in the pan, scooping all the contents into your roll. Voila! You've got a philly steak sub. Enjoy.

Listen while you browse...


Get a playlist! Standalone player Get Ringtones